

Introduction
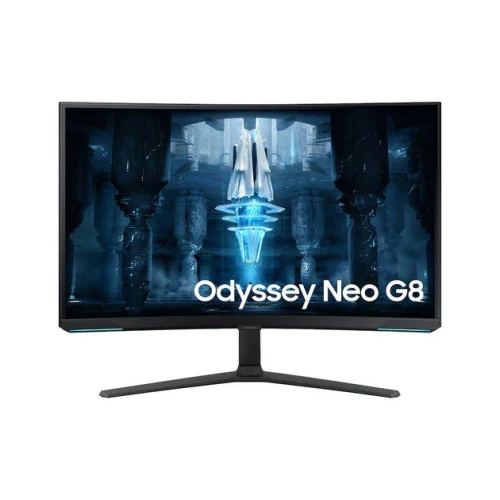
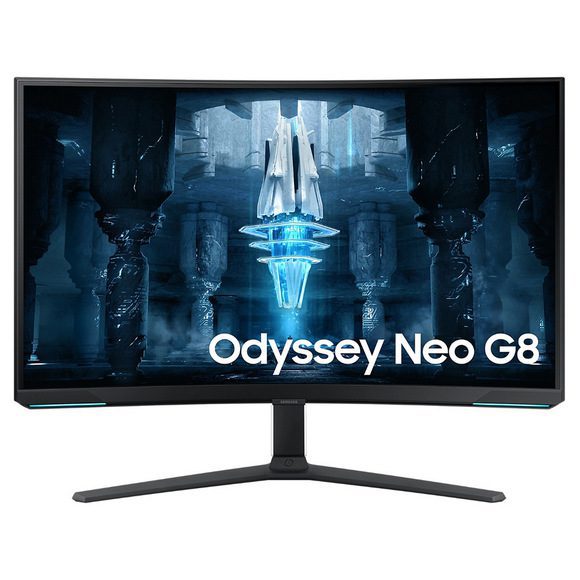
About 2 years ago Samsung launched their new Odyssey line-up of gaming monitors, two of which we reviewed at the time in the form of the 32″ C32G75T and 27″ C27G75T, or the “Odyssey G7” as they were known. These models marked a step-change in gaming capabilities, offering some impressive specs and performance including a 1440p resolution at 240Hz refresh rate, and the inclusion of HDR 600. These models also marked Samsung’s shift towards super-curved format screens, with the Odyssey G7 models offering a steep 1000R curvature that some people liked, and others found too aggressive. At the time we were particularly impressed in our review with the improvements Samsung had made with response times, and these were the first two screens we’d seen which had successfully eliminated the annoying black smearing you see on nearly all VA panels. This finally made VA a more viable option for high end gaming, and opens up the benefits of this panel technology like its high contrast ratios to more gamers. While we didn’t get chance to review it, in July 2021 Samsung later released the next generation of their Odyssey screens with their 49″ ultrawide Odyssey Neo G9. The Neo series brought even more impressive specs, with this G9 model offering a 5120 x 1440 resolution and 240Hz refresh rate, the same 1000R curvature (more sensible on a super ultra-wide like this) but most notably the inclusion of a Mini LED backlight for vastly improved HDR experience. This included a peak brightness of 2000 nits as well according to the specs. Samsung are continuing this trend today with their latest generation of Odyssey Neo screens including the model we have with us for testing – the Odyssey Neo G8. It’s full product name is the less catchy LS32BG850NUXXU, or perhaps shortened to 32BG850 – we prefer to call it the Odyssey Neo G8. This is the most impressive new display from a spec point of view, offering a 4K resolution combined with a 240Hz refresh rate. That’s a World’s first! The 1000R curvature is still here, but like the Neo G9, Samsung have added an impressive Mini LED backlight with 1,196 dimming zones, an advertised 1 million:1 contrast ratio and a 2000 nits peak brightness spec. The screen includes modern connectivity options as well like DisplayPort 1.4 with DSC (to make 4K at 240Hz viable) and HDMI 2.1 for latest gen consoles.Key Specs and Features
- 32″ sized panel with 1000R steep curvature
- 3840 x 2160 “4K” resolution
- VA technology panel
- 240Hz refresh rate
- Adaptive-sync VRR including AMD ‘FreeSync Premium Pro’ certification
- 1,196 zone “Quantum Mini LED” backlight
- “Quantum HDR 2000” with 2000 nits peak brightness and 1 million:1 contrast ratio for HDR
- Wide colour gamut with 95% DCI-P3 coverage
- 1x DisplayPort 1.4 (with DSC) and 2x HDMI 2.1 video connections
- RGB Core lighting
- Full adjustable stand with tilt, height, swivel and rotate
Default Setup
The Odyssey Neo G8 offers a wide colour gamut backlight which provides vivid and saturated colours well suited to modern multimedia, games and HDR content. If you like that more colourful appearance then the screen does nicely here. It’s also potentially more useful if you’re working with wide gamut content for photography and colour accurate work. However, for a lot of normal desktop uses actually you want to work with a smaller sRGB colour space and that can be more difficult on a wide gamut screen. We will see how this screen handles that usage scenario shortly. We first want to measure the accuracy of the default out-of-the-box setup relative to typical sRGB content, while also examining the screen’s suitability and accuracy for common wider colour gamut spaces such as Adobe RGB which is used in the professional and photography markets quite often. For these measurements we made sure that local dimming, dynamic brightness, the ECO sensor and Eye Care settings were all disabled, so as not to interfere with the measurements. The screen has local dimming enabled by default, and when you disable this you get a small increase to the screen brightness, which is actually set pretty low out of the box to start with (a setting of only 13). The screen is also factory calibrated according to Samsung in the default ‘custom’ mode, and rather than provide a printed calibration report in the box, the results are built in to the OSD menu in the ‘calibration report’ section as shown above. On our sample this report suggests that the screen has been calibrated to a 2.24 gamma average and a 1.46 dE greyscale maximum. It doesn’t list any target or results for colour temperature or colour accuracy though oddly. The screen looks very dark out of the box and is set for some reason at a brightness level of 13. This causes the image to look quite dull and washed out, but of course you can easily change this brightness control to your liking. It’s an odd default setting though when monitors are usually set much brighter out of the box, perhaps it’s some energy saving measure. We measured a default luminance of 61 nits which is low, but on the plus side because of the VA panel the contrast ratio was very good at 2450:1. Samsung don’t actually list a static contrast ratio spec other than what is applicable when local dimming is in use, but 2450:1 is certainly better than all IPS and TN Film technology displays, although as we’ve seen recently, the new ‘IPS Black’ panels are getting closer! We are aware that some other outlets have measured higher contrast ratio on their samples, but having tested this with various devices and software packages, our unit cannot reach more than 2500:1 unfortunately. Perhaps results will vary from sample to sample. The screen has a very wide adjustment range for the backlight by the way, allowing you to adjust between 329.5 cd/m2 and 14.2 cd/m2. It doesn’t quite reach as high as its 350 cd/m2 spec, but comes very close. This is without local dimming enabled keep in mind, and the screen can reach higher peak brightness levels for HDR content as we will look at later. There’s a very good adjustment range at the bottom end though for darker room conditions, and we confirmed a flicker free (PWM-free) backlight operation. The gamma curve was too high overall with an average 2.34 measured in our testing. In simple terms the brightness of each grey shade is higher than it should be, so there is some compressing of dark greys which can result in loss of shadow detail and some washing out of lighter grey shades as well. Visually the screen did look a little washed out, not helped by the overly dark brightness level which dulled the image. The balance of the RGB channels was also very variable as you can see from the middle graph, and although the average greyscale colour temp was measured at 6499K (0% deviance from our 6500K target) this really varied across the grey range. In darker shades the colour temp was too warm around 5700K, and in lighter grey shades it was too cool around 6900K. This wasn’t too drastic, but it led to some inconsistencies and the resulting greyscale accuracy measured on the right showed high dE errors at 4.3 average. We also had a white point that was 7% too cool at 6945K. All in all not a great default setup in these areas. The default ‘custom’ mode operates with the full native gamut of the backlight and as you can see from the top left CIE diagram above, this extends quite a long way beyond the sRGB reference space. We had a 98.9% absolute coverage of sRGB, and a 131.8% relative coverage with some small over-coverage in green and blue shades and a large over-coverage in red shades. This means that when viewing sRGB/SDR content, reds in particular look the most over-saturated in appearance. We measured a 94.3% coverage of DCI-P3 (105.1% relative) along with a 89.6% coverage of Adobe RGB (112.9%). As a result of running in this wide colour space the accuracy of sRGB colours is poor with a dE average of 4.1, maximum of 6.4. But this same thing applies to most wide gamut screens anyway. We will test the sRGB emulation mode in a moment and see whether that improves accuracy for sRGB content. The bottom section we have compared the colours against the wider Adobe RGB reference space, which is commonly used in professional and photography sectors. You can see from the CIE diagram that the screen’s colour space falls a bit short in green shades, and has a significant over-coverage in red shades compared to Adobe RGB, and we only had a 89.6% absolute coverage available as well. The accuracy of Adobe RGB colours was again poor with dE average of 4.4, max of 8.3 measured. This default mode felt very odd to us and left a lot to be desired to be honest. It’s supposed to be factory calibrated, although seemingly only for gamma and greyscale according to the report in the OSD menu, but from our measurements doesn’t achieve either of the supposed targets anyway. It’s set very dark out of the box and so looks quite dull and washed out which doesn’t give the best first impression. The RGB balance is also very varied which impacts greyscale accuracy, and the colour space is wide enough to make sRGB content inaccurate, while not really being wide enough to support wide gamut colour spaces like Adobe RGB properly. Contrast ratio was at least strong, but you will definitely want to make some tweaks to the settings to get a better looking picture. We will provide recommendations in a moment. For a mode that’s supposed to be factory calibrated we would expect more attention to detail and accuracy from Samsung.sRGB Emulation Mode
There is an sRGB preset mode available as well which includes an emulation of the sRGB colour space. There’s very little change here in these measurements compared with the default ‘custom’ mode. The gamma is too high still at 2.33 average. RGB balance is off and results in warmer dark greys, and cooler light greys as well as an 8% deviance and too cool white point at 7044K. The resulting greyscale accuracy is poor as well with dE 4.0 measured. The screen remains at the same low brightness with 58 nits measured here, but contrast remains consistently high as it was in the custom mode thankfully at 2445:1. The only real changes in this mode are in the colour section. You can see on the left now that the colour space of the monitor is closer to the sRGB reference space a bit. We had a slight over-clamping of the colour space in some shades resulting in a 96.1% sRGB absolute coverage which was fine, but we are left with some over-coverage still in blue and red shades, leaving a 112.4% relative coverage. We would have liked a tighter and more accurate clamping of the colour space in this mode. Thankfully you do still have control over settings like brightness, so you can move out of the overlay dark default mode. You also have access to gamma, but not to any of the colour settings which is a shame, especially as we’d seen the greyscale and white point colour temps show some deviance from our targets. Resulting colour accuracy was better than the native gamut mode, but only what we’d call moderate with a 3.0 dE average. This mode might be useful to some people when working with SDR content, but to be honest you shouldn’t expect particularly good accuracy if that’s an important factor for your work. Before we get in to the calibration we also measured each of the gamma modes in the menu to see if any of them improved the default mode 1 at all. That had shown a 2.34 gamma average which was too high. Mode 2 went the other way, being a bit too low with a 2.1 average. Mode 3 was even higher than mode 1 at 2.51 average. It’s a toss up between modes 1 and 2 really as to which is more accurate by default. You will need a calibration device to correct the gamma further. A proper calibration brought good results in this section. Gamma was now corrected very nicely to very close to 2.2 and the colour balance, greyscale colour temperature and white point were also now much better. We had a white point of 6532K (0% deviance) and this all resulted in a far more accurate greyscale with a dE average of only 0.3. Brightness had been adjusted to return a more comfortable and brighter 120 nits, while maintaining the strong VA contrast ratio at 2503:1. All good here, but we had to use a calibration device to get here. The problem came when trying to profile the native wide gamut mode back to the sRGB colour space. Despite many attempts in different modes, different colour temp modes and with different settings and even different calibration devices, we could not seem to get a perfect colour accuracy. We reached 1.4 dE average which is good, but some colours still showed some higher errors up to 4.0 for some reason and we couldn’t seem to correct this. If you want you can still try our calibrated ICC profile out.General and Office
One of the key features of this screen is its high 3840 x 2160 Ultra HD (“4K”) resolution which is an upgrade over the previous Odyssey G7 model which offered the same 240Hz refresh rate, but with a 2560 x 1440 resolution. Samsung have pushed up to 4K here while still keeping the same screen size and the same very high refresh rate. This 4K resolution is a bit too high to use at native scaling (100%) on a screen even of this pretty large 32″ size although some people may find it ok. Text is small but if you’ve got good eye-sight and are up close then it’s still reasonable and does provide you then with a massive screen real estate and very sharp picture. It’s certainly viable unlike on a 27″ models with 4K where you really have to use 150% scaling to make it usable. Other people will probably want to use operating system scaling to ensure fonts and text are a more sensible and readable size though. 150% is unnecessarily large, with 125% scaling offering a nice balance on a screen of this size we think. That gives you comfortable text size which is very similar to a 27″ 1440p screen, but does give you the equivalent desktop real-estate area of a 3072 x 1728 resolution. So that’s quite a nice jump up from common 2560 x 1440 resolution screens in this approximate size range and from the older Odyssey G7. The extra pixel density of the 4K resolution will provide a very sharp and clear image for all uses including office and general applications. Just make sure that your software will support scaling effectively as it can sometimes be a bit difficult to get it right. The curvature of the screen is likely to be a key consideration for buyers as the 1000R curvature is steep and aggressive, especially on a relative small, non-ultrawide screen like this. It may increase your feeling of immersion for gaming perhaps, and certainly it brings the edges of the screen closer to you, but at the same time if you are working with spreadsheets or any content where straight lines are important, this can look odd and cause problems. Images can look distorted and viewing angles of the panel are also tricky. You get pretty noticeable gamma shifts as you move horizontally, and especially vertically which wash out the image, and really you will want to be facing the screen head on to get the best experience. With the curvature it’s not really viable to view it from any other angle anyway. Personally I don’t like a curve of this type on a screen this size but that’s down to user taste. There is a very good brightness adjustment range provided by the screen, allowing you to control the brightness from ~330 nits all the way down to ~14 nits. This provides a lot of flexibility in a wide variety of working conditions, including darkened rooms which was good to see. The default out of the box brightness is very low though (~60 nits) and so you will almost certainly want to increase that to something more practical. A setting ~34 should return you a luminance close to 120 nits. Dimming is controlled without the need for PWM and so the backlight operation is flicker free which is good news. The default setup for both wide gamut and sRGB usage cannot really be considered very accurate sadly despite the supposed factory calibration; with a gamma that’s a bit too high, a slightly too cool white point and poor colour accuracy. It’s really set up more for gaming where this kind of thing is arguably less important. The sRGB clamping in the emulation mode is moderate but has some issues with the colour space matching, and resulting colour accuracy still. You would probably want to be able to calibrate and profile the screen with a colorimeter if you were doing anything reliant on accuracy for non-gaming uses we think. Confusingly Samsung list several options in the OSD menu that according to their documentation do the same thing. There is the ‘ECO sensor’ function that “Optimises brightness in real time, based on your lighting environment.” Then there’s also the Eye Care adaptive that “Optimises brightness and provides the best picture quality in real time, based on your lighting environment.” Not to mention the ‘Dynamic Brightness’ option that “Automatically adjust the Brightness to provide the best possible screen contrast under the current conditions”… So confusing. One or more of these seems to offer an ambient light sensor. The Samsung manual for this screen isn’t the clearest, and it feels like there’s so many caveats about every setting available that it becomes really difficult to figure out what you do and don’t want to use. The screen has a blue peak at 444 nm and is therefore not part of the Eyesafe certified range of products, which specifies a supposed harmful range between 415 – 455nm. There are no specific low blue light modes in the OSD menu, but there is an ‘Eye Care’ setting with options for low and high. Low makes the image a bit warmer at 5552K but starts to make the image look more washed out. The high setting is unusable with a colour temp warmer at 4661K, but with a very washed out appearance. We have no idea why Samsung choose to set the mode up like this, but can only assume it wasn’t tested by anyone with actual working eyes. The screen offers support for Picture in Picture (PiP) modes but oddly not Picture by Picture (PbP) with a range of different settings if you want to have multiple inputs displayed. There are a couple of USB 3 data ports and a headphone jack, but no other features that some people may like for office environments like USB type-C, KVM switches or motion sensors. You can find USB-C and KVM on a lot of modern gaming screens so if those are important, you will miss them here.Gaming
Refresh Rate and VRR
Gaming is a key focus of the Odyssey Neo G8 and this is the first screen we’ve seen released that combines a 4K resolution with a high 240Hz refresh rate! This is achieved thanks to DSC (Display Stream Compression) over DisplayPort so make sure you have a modern graphics card that supports this. The screen actually comes out of the box locked to a 120Hz mode which Samsung list as “optimal” in the user manual. The switch between 120Hz mode and 240Hz mode is available as a setting in the OSD menu. You need to switch this to 240Hz before that mode is available to you in Windows.| (at native resolution) | Refresh Rate |
| Maximum Refresh Rate DisplayPort | 240Hz |
| Maximum Refresh Rate HDMI | 240Hz |
| VRR range | 68 – 240Hz +LFC (DP and HDMI) |
| VRR capabilities and Certification | |
| AMD FreeSync Premium certification | FreeSync Premium Pro |
| Native NVIDIA G-sync module | |
| NVIDIA ‘G-sync Compatible’ certified | |
| HDMI-VRR (consoles via HDMI 2.1) |
| TFTCentral is a participant in the Amazon Services LLC Associates Programme, an affiliate advertising programme designed to provide a means for sites to earn advertising fees by advertising and linking to Amazon.com, Amazon.co.uk, Amazon.de, Amazon.ca and other Amazon stores worldwide. We also participate in a similar scheme for Overclockers.co.uk. |
Response Times
| Response Times | |
| Panel Manufacturer | CSOT |
| Panel Technology | VA-type |
| Panel Part | CY-PB315GLHV1H/V |
| Quoted G2G Response Time | 1ms G2G |
| Quoted MPRT Response Time | n/a |
| Overdrive Used | |
| Variable Overdrive supported | |
| Overdrive Control Available Via OSD Setting | (only with Adaptive-sync OFF) |
| Overdrive OSD Settings | Standard, Faster, Extreme (plus Extreme MBR mode for blur reduction) |
Motion Clarity – Pursuit Camera Photos
We captured some pursuit camera photos which demonstrate real-world perceived motion clarity at 240Hz in each of the response time modes. You can see that there is some small overshoot in the ‘faster’ mode on the middle image without any real improvement to motion clarity to show for it compared with the standard setting, and this overshoot gets more pronounced when you move up to the ‘extreme’ mode, also then starting to impact the top image. The ‘standard’ mode is visually equivalent to adaptive-sync ON mode and we would recommend using adaptive-sync for VRR situations (obviously), and wherever possible. If you are going to disable it, we think the standard mode is likely to be preferable for most users.Extreme (MBR) – Extreme Motion Blur Reduction
| Motion Blur Reduction Mode | ||
| Motion Blur Reduction Backlight | ||
| Blur reduction available with G-sync/FreeSync VRR | ||
| Strobe length control | ||
| Strobe timing control | ||
| Brightness capability (SDR, max refresh rate supported) | ||
| Motion blur OFF – Max brightness | 330 nits | |
| Motion blur ON – Max brightness | 181 nits | |
Console Gaming
| Console Gaming | |
| Native panel resolution | 3840 x 2160 “4K” |
| Maximum resolution and refresh rate supported | 4K @ 120Hz |
| PlayStation 5 support | 4K @ 120Hz 4:2:2 chroma (console limit) |
| Xbox Series X support | 4K @ 120Hz 4:4:4 chroma |
| Virtual 4K support | (not needed) |
| 4K at 24Hz support | |
| 4K at 50Hz support | |
| HDMI connection version | v2.1 |
| HDMI connection bandwidth | 40Gbps |
| HDMI-VRR (over HDMI 2.1) | |
| Adaptive-sync (FreeSync) over HDMI | |
| Auto Low Latency Mode (ALLM) | |
| Display aspect ratio controls | Auto, Wide, range of 4:3/16:9/16:10 sizes |
| Ultra high speed HDMI 2.1 cable provided |
Lag
- Class 1) Less than 8.33ms – the equivalent to 1 frame lag of a display at 120Hz refresh rate – should be fine for gamers, even at high levels
- Class 2) A lag of 8.33 – 16.66ms – the equivalent of one to two frames at a 120Hz refresh rate – moderate lag but should be fine for many gamers. Caution advised for serious gaming
- Class 3) A lag of more than 16.66ms – the equivalent of more than 2 frames at a refresh rate of 120Hz – Some noticeable lag in daily usage, not suitable for high end gaming
High Dynamic Range (HDR)
The Odyssey Neo G8 features a so-called “Quantum Mini LED” Full Array Local Dimming (FALD) backlight with an impressive 1,196 local dimming zones. This sets it apart from common edge lit local dimming monitors, including the old Odyssey G7 range which only had a measly 8 edge lit zones. FALD backlights provide a much better control over the image on the screen, being able to dim smaller parts of the image while brightening others to improve the contrast and dynamic range. Dark areas can often be dimmed so low that they are basically being turned off, while bright highlights can often be brightened to very high peak brightness levels. That’s one of the key benefits in using a direct lit backlight with many zones like this. Each zone is responsible for around 6935 pixels which obviously isn’t as finite in control as something like OLED which has per-pixel level dimming control. 1,196 zones is very good though on a screen this size. This helps reduce blooming and halos in practice, aided by the VA panel with it’s strong static contrast ratio. We will talk about the 3 available local dimming modes in a moment, but it’s possible to create a very pleasing HDR experience on the Neo G8, with low levels of blooming, deep blacks and bright highlights. HDR content is very enjoyable on the screen. There are still challenges on very specific content like star fields for instance, or scenes with very small bright areas, but that’s going to be hard for an FALD screen to handle and you really need something like OLED to avoid all halos. The performance here is way beyond the older Odyssey G7 models in all regards, with better blacks, better bright areas and much better local dimming capability. This is one of the major upgrades with the new Odyssey Neo series. In our very specific test patterns where you have fixed sized boxes, you do see what we would call “dirty edges” for want of a better term, where the dimming starts to make edges of fixed shapes darker. You are unlikely to see this in real HDR content, but on even a high zone FALD like this isn’t not possible to avoid the points where a zone has to decide if it’s going to be bright or dark, and so you get some blending between the two as the image varies. It appears on this screen that Samsung have tried to optimise the performance to avoid halos which is probably a good thing overall. Samsung advertise on their website a “typical” peak brightness of 1000 nits, which in itself is impressive for a screen you’re going to be using up close. However, they also promote the so-called “Quantum HDR 2000” capabilities of this screen, suggesting it is capable of a 2000 nits peak brightness as well. We should note that there is no VESA DisplayHDR certification that goes this high with their highest brightness tier being DisplayHDR 1400. In fact this Samsung screen doesn’t appear to be certified at all by VESA under any tier, at least according to the VESA certified product list. It’s also not listed on Samsung’s product page. Is this because Samsung want to promote “HDR 2000” as opposed to only receiving the HDR 1400 badge maximum from VESA? Is this because actually it can’t meet the testing and certification criteria for VESA’s standard either? We aren’t really fans of manufacturers inventing their own HDR certifications, especially when it’s clear that by branding it as “HDR 2000”, people are going to assume that it is the same kind of certification as other screens they see that actually earned that badge in a different way, and were certified properly. What does “Quantum HDR 2000” even mean?! Must everything from Samsung now have the word “Quantum” in it? Yeah, we get it, you use Quantum Dots… Anyway, back to the “Samsung Quantum Odyssey Neo 2000 G8 Quantum”. Within the OSD menu there is a setting for local dimming with options for auto, low, high and off. We will test the performance in each of those modes in a moment.| HDR Technical Capabilities | ||
| VESA DisplayHDR certification level | None | |
| HDR formats supported | HDR 10 only | |
| Local dimming | 1,196 zone FALD | |
| High number of local dimming zones | 1,196 zone FALD | |
| Increased peak brightness | 1097 nits measured | |
| Reaching advertised peak brightness | nowhere near 2000 nits advertised | |
| Increased dynamic range (contrast) max | >500,000:1 | |
| Increased “local” HDR contrast ratio max | >17,000:1 | |
| Wide colour gamut >90% DCI-P3 | 94.3% absolute coverage 105.1% relative coverage | |
| 10-bit colour depth support | Supported | |
Local Dimming Setting and Tests
The only other setting you have access to is the local dimming control, with options for auto, low and high available. We tested each of the HDR modes to see how they performed in a range of visual tests and measurements. You can flick through each local dimming mode using the tabs in the sections below: There was very little difference in the setup of any of these modes in these measurements apart from in PQ curve tracking. They all showed very similar greyscale dE, and the colour temp, RGB balance and white point were all very similar. Note that the RGB balance is off in lighter grey shades resulting in a cooler image including at white which we measured at 7067K. The only real difference in these measurements was in the screens peak brightness (more on that in a moment) and in the tracking of the PQ curve. The low setting followed PQ more accurately but doesn’t get as bright overall, whereas the auto and high modes were further away from the target PQ curve and showed greys that were a fair bit brighter than the intended shade. This was particularly evident in the auto mode where even the dark grey shades were brighter than they should be. The main difference in the measurements was in the peak brightness. The auto and high modes were very similar, but the low mode delivered much lower peak brightness. We reached only around 750 nits peak brightness (10% window) vs ~1100 nits in the other modes. The low auto dimming mode seemed to focus more on reducing halos and blooming by being a little more subtle in its local dimming. It therefore doesn’t push the peak brightness as high as the other modes, but you do get a more subtle difference between zones and this can help reduce blooming further. You can still reach the same ~1100 nits peak brightness in some specific test situations when using the ‘low’ mode, but it’s far less likely and common as the backlight dimming and brightening is more subtle and gradual. Although it’s not really detailed by Samsung it seems that Auto is very similar to high, although it’s not clear if the auto mode is supposed to be doing something different. This is probably the kind of thing you’d want to play around with in practice and find the setting that looks best for your usage, content and preferences. We measured some impressive contrast ratio improvements with local dimming enabled in HDR. Full screen/single frame contrast ratio measuring a 10% white area in the centre, relative to a black area near the edge of the screen (far away) reaches over 500,000:1 comfortably. “Local contrast” ratio measuring adjacent white and black areas reaches >17,000:1 and improves on the screens native contrast ratio of ~2500:1 nicely. The local dimming can do a good job of dimming dark areas while brightening light areas. A checkerboard pattern delivered the same performance for local contrast ratio. There was very little difference in colour accuracy between any of these three modes, as the local dimming isn’t really changing anything there anyway. Note that these measurements were excluding luminance error. You can see that the coverage of the large Rec.2020 colour space used for HDR content is moderate at 76.1%. You can find some screens that push higher than this, but the coverage here is fairly typical for a monitor. The colour accuracy of Rec.2020 colours is unfortunately poor overall, we would have liked to have seen more focus from Samsung on factory calibration in the HDR mode.Further recommended reading
Our detailed HDR article